
How to Sync Voice Over to Video Without Rushing Speech
Sync voice over to video with scene markers, a two-column script, practical duration checks, and careful edits that keep narration aligned with the action.
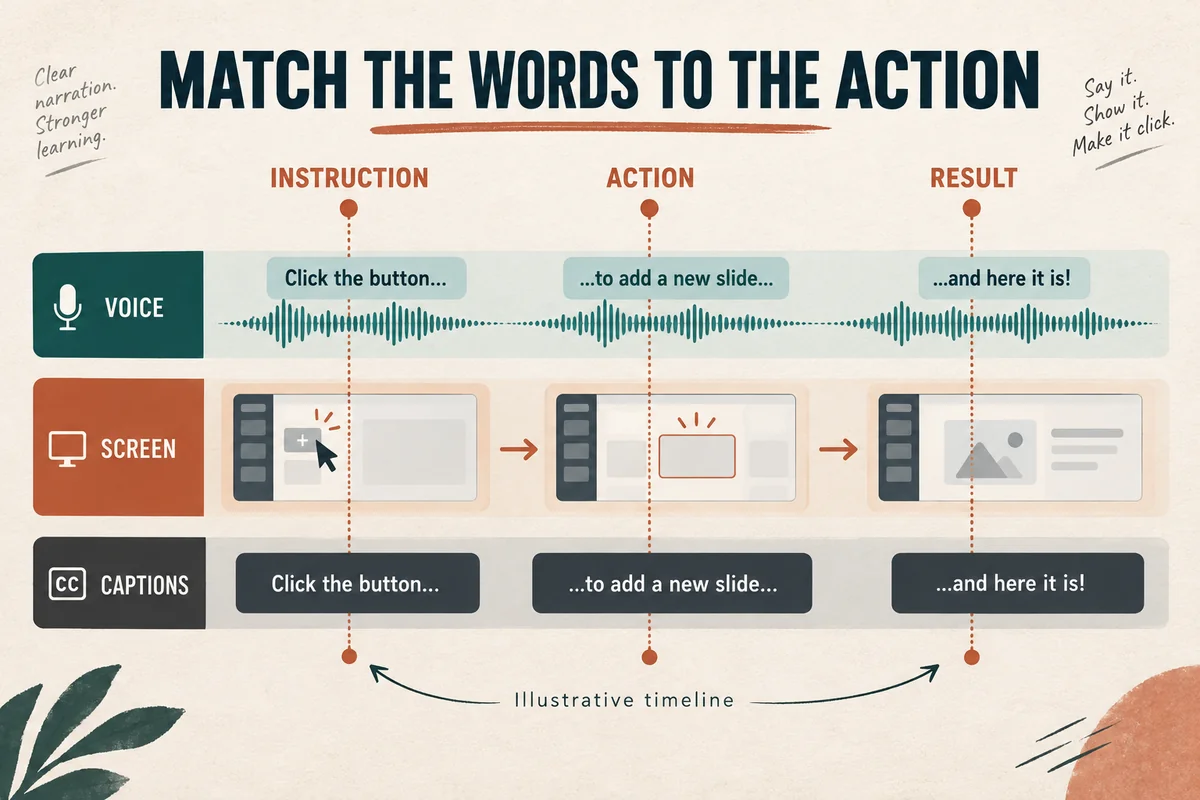
To sync voice over to video, divide the video into meaningful scenes, mark the action each line refers to, and place the narration around those markers. When a line does not fit, revise the wording or the visual timing before forcing the voice to speak much faster.
The goal is not simply to make the audio and video end together. The important words need to arrive when the viewer can connect them to the right action, object, or result.
Decide whether the picture or narration is fixed
Some projects begin with an approved video that cannot change. Others begin with a script and flexible visuals. Identify which parts are fixed before editing.
For a recorded interview or a live demonstration, you may need to work around existing moments. For a screen tutorial, you may be able to hold a frame, rerecord an action, or remove unnecessary waiting.
Write the constraints in the project notes: total duration, required scenes, fixed transitions, and any approved wording that must remain exact. This prevents solving a timing problem by changing something that cannot be changed.
If both picture and narration are still flexible, edit them together. A small script improvement and a small visual adjustment are often easier than a large change to either one alone.
Create a cue sheet around actions
Use a simple table with the scene, intended timing, visual event, and narration. The timing can be approximate at first.
| Scene | Visual event | Narration cue |
|---|---|---|
| Opening | Finished result appears | State what the viewer will create |
| Step one | Project list opens | Explain which project to choose |
| Step two | Relevant control is highlighted | Name the action before it happens |
| Result | Updated preview is visible | Explain what changed |
Do not use a separate line for every cursor movement. Group movements into meaningful actions. The voice should explain the task, not narrate every pixel.
For a product walkthrough, the product demo voice-over guide shows how to keep the script focused on outcomes rather than menu tourism.
Measure the generated audio
Generate a draft of each section and measure the actual duration in the editor. A word-count estimate is useful for planning, but the generated file is the evidence you need for timing.
Suppose a scene has twelve seconds available and its narration lasts fifteen seconds. That is a three-second mismatch. First ask whether the line contains repeated information or a long introduction.
“The next thing we are going to do is select the project that we want to work on” can become “Select the project you want to edit.” The shorter version keeps the action and removes setup language.
If the words are already necessary, consider extending the scene or dividing the instruction across two views. Do not speed up every sentence merely because one scene is crowded.
Align the key word with the key event
Place the narration so the viewer has enough context to follow the action. An instruction often works best just before the action; an explanation of a result often belongs while the result is visible.
For example, say “Choose Preview” before or as the relevant button is highlighted. Let the viewer see the changed preview while hearing what to inspect.
If the narration says “the panel on the left,” make sure that panel is still visible. A cut to a different layout can make an accurate line confusing.
Use timeline markers for the essential events. Then play through each sequence at normal speed without stopping. A timeline can look neatly aligned while still feeling awkward in motion.
For short videos, protect the demonstration's timing before trimming the opening or ending. The short-form script guide offers structures that leave room for the useful moment.
Use pauses and visual holds deliberately
Silence between thoughts can give the viewer time to inspect a screen. Keep useful pauses even if the waveform looks less continuous.
If the narration ends early, do not automatically fill the remaining time with another sentence. Show the result, highlight the relevant detail, or leave a clean transition.
A still-frame hold can help when a screen needs more reading time, but check whether the cursor, animation, or progress indicator makes the freeze obvious. Sometimes rerecording the action at a calmer pace is cleaner.
If you change audio speed in your editor, use a small test and listen for altered quality or unnatural delivery. The appropriate amount depends on the material and tool. There is no universal percentage that works for every voice.
Repair transitions without damaging words
When replacing a line, include enough surrounding audio to make a natural transition. Avoid cutting into the first consonant or final syllable.
Listen for changes in tone, loudness, and pace between the replacement and neighboring segments. A sentence that fits the time slot may still feel like it came from another recording.
Check clip overlaps carefully. An accidental overlap can double a word or create a confusing echo. A gap that is too short can make two otherwise natural sentences feel rushed.
After moving a segment, inspect everything that follows it. Some edits shift later clips; others leave them in place. Confirm the intended behavior instead of assuming the timeline stayed synchronized.
Review the whole export with captions
Once the narration is approved, update the captions to match its final timing. A corrected voice track with old caption timestamps still produces a confusing video.
Follow the caption preparation guide, then watch the exported file from beginning to end. Check the first frame, last word, and transitions where multiple changes occurred.
For a second review, ask someone unfamiliar with the script to follow the actions. Their hesitation can reveal a timing issue you no longer notice after repeated editing.
Should narration always start at the first frame? No. Start when it helps orient the viewer. A short visual introduction can work if it has a purpose.
Can I fix synchronization by matching total duration? Matching the end points is only one check. Every important line still needs to correspond with the correct visual.
What should I save for future revisions? Keep the cue sheet, approved audio segments, source project, and caption file. They make a later wording change much easier to place accurately.
Try Our Voice Clone Demo
Hear your words come to life
Choose a voice and try a short preview.
Listen to sample voices
Hear examples before choosing a voice. Generated results can vary with the script and reference sample.
Looking for another voice?
Explore the library and listen to a sample before you create.

Morgan Freeman

Stephen Hawking

Christiano Ronaldo

Donald Trump

Kokoro

Disney XD Announcer

Cute Japanese Girl
Vin

Adam Stone
Transform Your Content with AI Voice Technology Today
Try a short voice preview, then create speech and save your audio in a workspace built for your next project.
Generate Your Voice Now