
WAV vs MP3 for Voice Cloning: Choosing Your Source File
Compare WAV and MP3 for voice cloning, understand compression and file size, and choose a clean source without unnecessary conversions or oversized uploads.
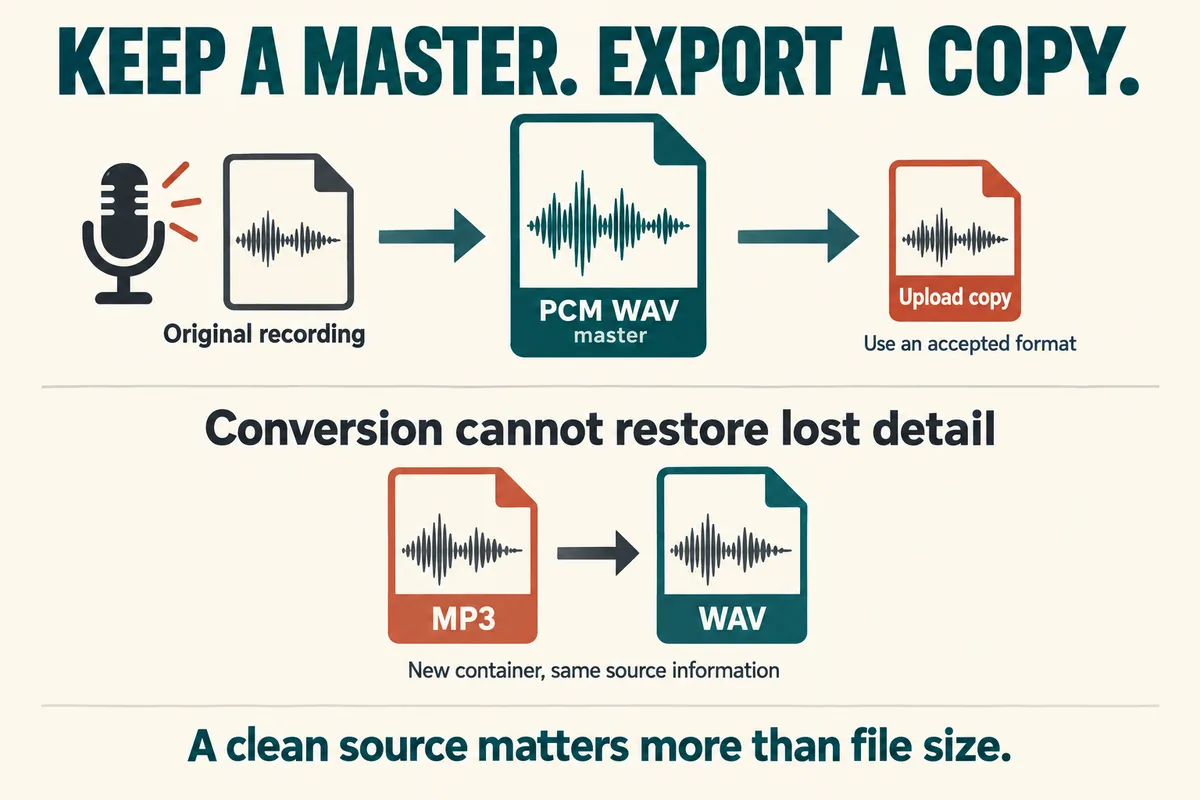
For a new voice recording, keep an uncompressed PCM WAV master when your recorder allows it, then create an upload copy in the format your voice tool accepts. If your only clean source is an MP3, it may still be usable. Converting that MP3 into WAV does not restore information already removed during compression.
The most useful choice is usually the cleanest original recording that meets the destination's requirements. A noisy WAV is not automatically a better voice reference than a clear MP3.
Understand what the file extension tells you
WAV is a container format. In ordinary recording workflows, it often contains uncompressed PCM audio. MP3 is a compressed audio format designed to reduce file size.
That distinction matters because lossy compression trades some source information for smaller files. A larger file can preserve more of the original recording, but size alone does not tell you whether the speaker was clear, the microphone distorted, or the room echoed.
MDN's audio codec guide distinguishes lossy compression from formats that preserve the original decoded audio. It also explains why repeated compression matters in editing workflows.
Check the actual export settings rather than relying only on the filename. Renaming “recording.mp3” to “recording.wav” does not convert the audio. Use a proper export or conversion function when a different format is required.
Choose the source before choosing the format
Imagine you have two files. One is a large WAV recorded across the room while a fan is running. The other is an MP3 captured clearly at a stable distance in a quiet room. Begin by listening to both, because the second may be the more useful source.
Use a short checklist:
- One speaker is clearly audible.
- No music or overlapping conversation competes with the voice.
- Loud words do not crackle or sound broken.
- Soft endings remain understandable.
- The voice stays reasonably consistent in tone and distance.
If you can record again, follow the voice cloning sample guide and preserve the original quality from the start. If you cannot, choose the best existing source and avoid unnecessary conversions.
Do not use file size as a substitute for listening. A long stereo recording of silence can be larger than a short, useful voice sample.
Understand the main export choices
Sample rate describes how often audio is sampled. Bit depth describes the precision used for each sample in PCM audio. Channel count tells you whether the file contains one channel, two channels, or more.
Those are different from an MP3's encoded bitrate. A bitrate setting controls how much data the compressed file uses over time. The terms are easy to mix up because all appear in export dialogs.
For a new recording, retain the recorder's sensible original settings unless the destination specifies something else. Raising the sample rate afterward does not create new detail from the original performance. Similarly, exporting a low-quality source at a higher bitrate cannot undo earlier losses.
For a single microphone, a mono recording is often a straightforward working choice. If an existing stereo file has useful audio on only one side, inspect it carefully before conversion. Do not assume both channels contain identical material.
These are preparation principles, not a claim about the accepted settings of a particular voice service. Check the current upload interface for those requirements.
Estimate size without overcomplicating the workflow
An uncompressed PCM file's audio data size can be estimated from duration, sample rate, bit depth, and channels. For example, sixty seconds at forty-eight thousand samples per second, sixteen bits per sample, and one channel uses about 5.76 million bytes of audio data.
That example is a calculation, not a recommended upload specification. It illustrates why doubling duration or channel count increases the amount of uncompressed data.
A compressed file can be much smaller, which is convenient for transfer. If the upload limit is the problem, first confirm that the selected excerpt contains only the material you need. Remove an accidental ten-minute tail before reducing the quality of a one-minute useful recording.
Keep the working master even when you create a smaller delivery copy. Storage organization is cheaper in effort than reconstructing a source from several compressed exports later.
Avoid a chain of unnecessary conversions
A sensible workflow looks like this: original recording, edited master, final upload copy. Keep the original and edited master so future changes can start from a good source.
An awkward workflow looks like this: MP3 download, MP3 export after trimming, another MP3 export after cleanup, then WAV conversion for upload. Each step adds confusion about which file you should trust.
If cleanup is necessary, work from the original and combine your edits before the final export. Our guide to removing background noise explains how to compare results without overprocessing.
Use clear names such as “voice-original,” “voice-edited-master,” and “voice-upload.” Include the format in your file browser view so similarly named files remain distinguishable.
Test the delivered file, not just the editor preview
Open the exported file in a separate player. Confirm that the first word, final word, and quietest sentence are intact. Check that the file contains the intended speaker and excerpt.
If the receiving tool rejects it, read the error and compare the actual file properties with the stated requirements. Change the relevant property once and try again. Repeated random conversions make it harder to identify the real mismatch.
After a successful upload, evaluate a short generation using familiar text. If the output has glitches, investigate the text, reference, and export separately. The AI voice artifact guide gives a structured way to isolate those causes.
Format questions
Should I convert an MP3 to WAV before uploading? Only when the destination requires WAV or your editing workflow benefits from it. The conversion does not restore lost source information.
Is the largest file always best? No. Clarity, consistency, and compatibility matter more than size alone.
Can I delete the master after uploading? Keeping it is useful. A future edit, different destination, or replacement upload is easier when you still have the original recording.
Try Our Voice Clone Demo
Hear your words come to life
Choose a voice and try a short preview.
Listen to sample voices
Hear examples before choosing a voice. Generated results can vary with the script and reference sample.
Looking for another voice?
Explore the library and listen to a sample before you create.

Morgan Freeman

Stephen Hawking

Christiano Ronaldo

Donald Trump

Kokoro

Disney XD Announcer

Cute Japanese Girl
Vin

Adam Stone
Transform Your Content with AI Voice Technology Today
Try a short voice preview, then create speech and save your audio in a workspace built for your next project.
Generate Your Voice Now